How to work with timelines in the Animatronic Workbench Studio
Animatronic Workbench is an open source solution for controlling animatronic characters. This means that movements no longer have to be laboriously programmed, but can simply be created with a graphical editor.
How to install and set up the software is described in the Installation Guide.
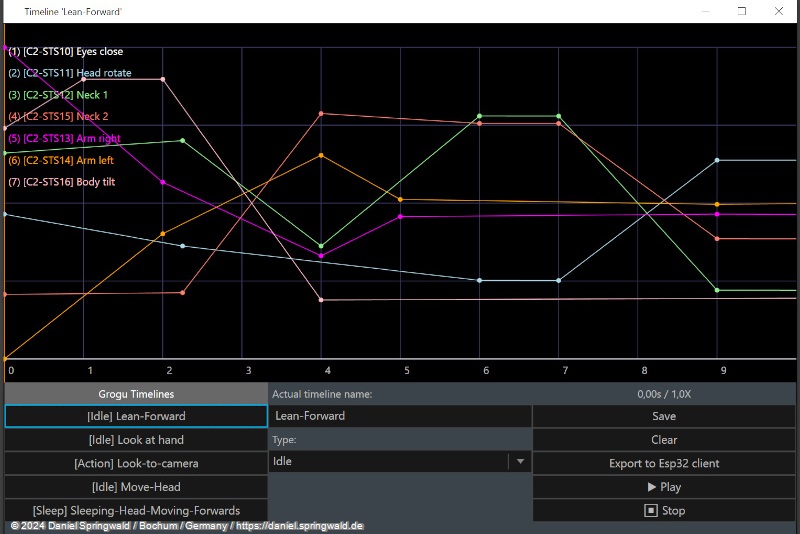
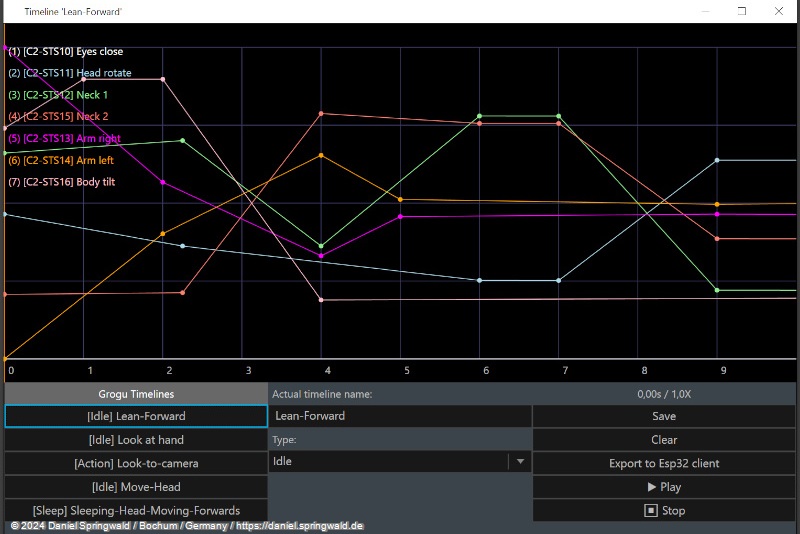
Structure of the Timeline Editor
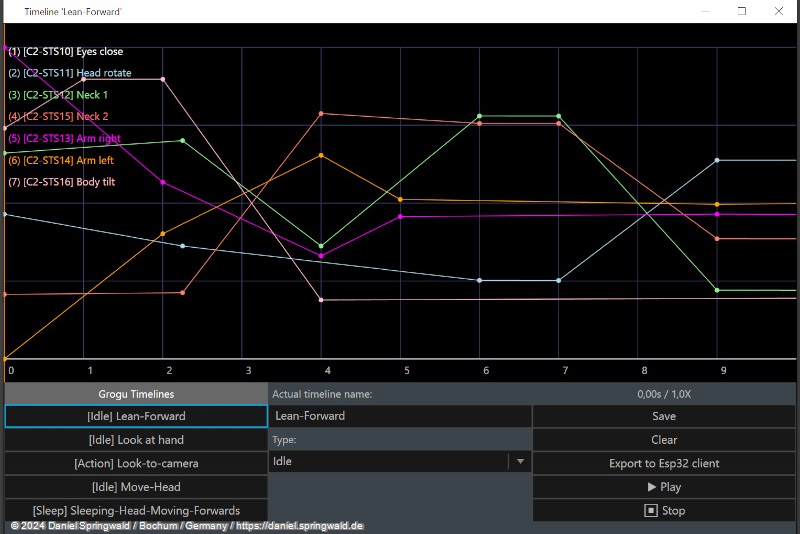
The timeline editor consists of the following elements:
- Timeline List: All timelines defined in the project are displayed here.
- Overall View: Here the selected timeline with all actuators is displayed.
- Timeline Metadata: Here you can edit the metadata of the selected timeline.
- Actuator View: Here the keyframes for each actuator are displayed individually and can be edited.
- Keyframe Editor: Here you can select the state of the actuator for a single keyframe for the selected actuator.
- Play Control: Here the timeline can be played and stopped.
- COM Port: Here you can select, start or stop the COM port through which the live control of the animatronic character takes place.
The Timeline List
The overall view
The Timeline Metadata
The Actuator View
The Keyframe Editor
The Play Controls
The COM port
Creating Keyframes
Use the optional midi controller
Exporting Microcontroller Source Code
Let's continue with the Export of the project for ESP32 microcontrollers.
 Daniel
 deutsche Version anzeigen